Monday, December 18, 2017

Fried Rice With Tofu

Fried Rice with Tofu
Fried Rice with Tofu, easy and fast!

Fried Rice With Tofu

A fast and simple weeknight dinner that everyone will love.

Serves 4

1 tablespoon canola oil plus 1 teaspoon canola oil, separated
3 eggs beaten
3 green onions thinly sliced
1 tablespoon fresh ginger, finely chopped
2 carrots finely diced
1 celery stick, finely diced
1 jalapeno pepper, seeded, diced small
1 red or yellow bell pepper, diced small
½ cup frozen peas
1 package firm tofu, cut into small cubes (or cooked chicken)
4 cups cooked white rice
½ cup soy sauce

Heat 1 teaspoon oil in a wok over medium-high heat. Add eggs and scramble until cooked, but not too dry. Remove eggs and clean out pan. Heat 1 tablespoon oil in the wok over high heat. Add onions and sauté with garlic, ginger, carrots, celery jalapeno pepper and red bell pepper. Sauté until vegetables soften, about 3 minutes. Add peas and tofu and sauté another 3 minutes. Add rice, soy sauce and eggs. Mix until combined and rice is hot.


Tuesday, December 12, 2017

Yummy Tuna and Pasta Casserole

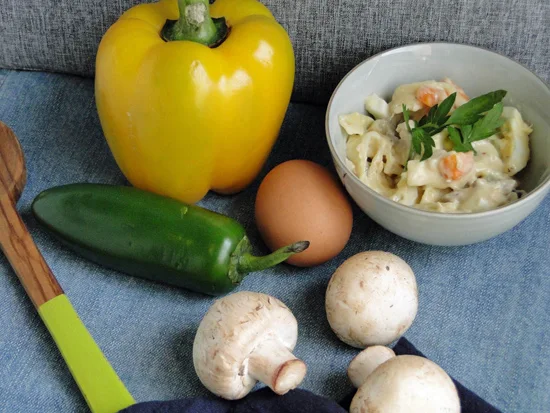
Picture of Tuna Casserole
Tuna and Pasta Casserole


Serve with a big green salad and you have a delicious easy dinner that the whole family will love.

Serves 4

½ package egg noodles
¼ cup butter
¼ cup flour
2 cups milk
½ teaspoon dry mustard powder
1 cup sharp cheddar cheese, grated
2 hardboiled eggs, thinly sliced
1 (7 oz) can tuna, drained
2 teaspoons vegetable oil
½ cup onion, diced
1 clove garlic, minced
1 cup sliced mushrooms (optional)
¼ cup red peppers, diced (optional)
1 cup bread crumbs or 1 cup crushed regular potato chips

Preheat oven to 350 ° F. Cook noodles according to the package. Drain, rinse, place into a casserole dish and set aside. Melt the butter over medium low heat in a medium-sized saucepan. Add flour and stir until lightly brown. Turn up heat to medium and slowly whisk in milk. Stir constantly until mixture thickens. Add dry mustard powder, cheese, hardboiled eggs and tuna. Spoon into noodles. Heat oil in a small skillet over medium-high heat. Add onions, garlic, mushrooms, and red peppers and sauté until soft, about 5 minutes. Add onion mixture to the noodles. Mix to combine. Sprinkle bread crumbs or crushed potato chips on top. Bake 20 minutes in oven. Serve with a green salad.

Tuna & Pasta Casserole Recipe
Tuna Casserole, a family favourite

Sunday, December 10, 2017

What is White Canned Tuna?


Canned Albacore Tuna

Do You Buy Canned White Albacore Tuna?


When you buy canned tuna fish at the grocery store do you buy white or light?  I recommend white tuna, also called Albacore tuna.  

Thursday, November 30, 2017

Dad's Cookies

I found this recipe in an old cookbook of my mother's. It must be at least 40 years old! It's very similar to the iconic 'Dad's Cookies' found at the grocery store today, but much tastier!

Stack of homemade Dad's Cookies. Filled with Oatmeal and coconut
Dad's oatmeal, coconut cookies


Dad's Cookies


An old simple recipe worth making! 

 Makes 16 cookies

1 cup butter
2 cup brown sugar
2 large eggs
1 teaspoon vanilla
2 cups flour
1 teaspoon baking powder
1/2 teaspoon baking soda
1/4 teaspoon salt
2 cups oats
2 cups coconut

Preheat oven to 350 degrees F. 

With an electric beater cream butter and brown sugar together.  Mix in eggs and vanilla. 

In a separate bowl combine the flour, baking powder, baking soda, salt, oats and coconut.  

Mix into butter mixture.  Drop by a heaping teaspoon onto a cookie sheet lined with parchment paper.

Press with a fork dipped in cold water. 

 Bake for 8-10 minutes at 350 degrees F.

Dad's Cookies loaded with oatmeal and coconut

Other cookies to try:


spice cookies with raisins and walnuts
Spice cookies with raisins and walnuts

Chia seed oatmeal coconut chocolate chip cookies
Cia Seed Oatmeal Coconut

Somewhat health cookies
Somewhat healthy cookies

How To Eat Kohlrabi


How to eat and cook kohlrabi
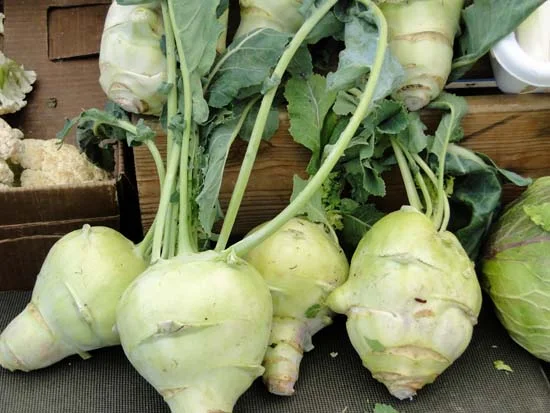
Green Kohlrabi


Do you buy and eat kohlrabi?  It’s a vegetable that looks intriguing but also intimidating.  It reminds me of a remote controlled green (or purple or white) space ship with green parachute leaves.  What do you with it?  Peel it? Cook it?  Or eat it raw?

I was told years ago in one of my classes that they were easy to grow and worth growing to eat, because they were, well, worth it.  


So when I found one sitting in my CSA box last season I was pleasantly surprised because I would be forced to try it.


I’m glad I did.  I peeled off the thick green layers, chunked it up and threw it into the evening stir fry.  I also threw some smaller pieces into a salad to eat raw.  It had a pleasant radish/turnip taste which melded  nicely with all the other veggies.


So, if you’re looking to add excitement to your nightly cooking routine, I challenge you to buy a veggie that you’ve never tried before but always wondered what it tastes like, such as Kohlrabi. Buy it, bring it home, figure out what to do with it and eat it.  You too, may be 

Monday, November 20, 2017

Cranberry Loaf


Here's a simple and colourful cranberry loaf to try. Buy a couple extra bags of cranberries when in season and freeze them so you can make this loaf throughout the year. Yah! A perfect treat to nibble on with your afternoon coffee.

Cranberry Loaf that is loaded with fresh cranberries
Cranberry loaf

Saturday, November 4, 2017

Peanut Butter Granola Bars

Peanut Butter Granola Bars
Peanut Butter Granola Bars with Chocolate Chips


Peanut Butter Granola Bars


A delicious treat that’s easy to make and good for the whole family.

1 cup smooth peanut butter
1/2 cup brown sugar
1/2 cup honey
1/3 cup melted butter
2 teaspoons vanilla
3 cups rolled oats
1/2 cup shredded coconut
1/2 cup unsalted sunflower seeds
1/2 cup sweetened dried cranberries
1/4 cup sesame seeds
1/2 cup chocolate chips
1/2 teaspoon salt


Preheat oven to 350 degrees F.  In a large bowl mix peanut butter, sugar, honey, melted butter and vanilla. Mix until smooth.  Stir in oats, coconut, sunflower seeds, dried cranberries, sesame seeds, chocolate chips, and salt.  Mix well.  Pat into a 9 x 13 inch baking pan lined with parchment paper. Bake 25 - 30 minutes until lightly brown.  Let cool before cutting into bars.  Freeze extra.

Wednesday, October 25, 2017

Self-Care Healthy Eating Tips For Moms

A mom’s life is like being on a roller coaster ride going in circles.  You do everything and look after everyone: the kids, the dog, the house, schedules, daycare, appointments, meal planning, shopping, family obligations, real work to pay the bills, and in your ‘spare time,’ you squeeze in a personal life. It’s exhausting.

We’re so busy looking after everyone else that we tend to put self-care, including healthy eating, on the “I’ll do it later” list.  

But think about it. If you get sick, who’s going to get the stuff done?  

You are. 

That’s why self-care healthy eating is important to add at the top of your list.  It’s a doable goal and here are some tips to help you out.


Stressed mom holding baby and cooking
Self Care Healthy Eating Tips For Moms


1.  Get up 10 minutes earlier and feed yourself breakfast first.


You’ve probably heard it many times, ‘Breakfast is the most important meal of the day.’ Why?  Because if you sleep 7-8 hours you’re basically starving yourself at night.  Your body needs fuel to kick-start into gear when you get up.  Even if your groggy brain doesn’t register it.  Fill your belly. It could be simply a banana and toast with peanut butter.  Then, your body can relax, gear down and slide out of starvation mode.  This will take away the urge to hunt down sugary foods later in the day when you’re ravenous. 


2.  Have a healthy mommy snack bag ready to go.


You wouldn’t leave the house without some sort of snack for your kids, so why not have one for yourself? Even better, use an insulated bag with an ice pack to keep things cold.  


If you’re in line at a coffee shop and the hunger pangs start, the call of those sugary treats will be hard to ignore.  But, if you have a healthy snack such as the peanut butter granola bar (in this newsletter) in your mommy snack bag, you’ll dive into those instead of buying something you’ll regret later.  Other snacks you could throw in are:  nuts, apples, dried fruit, trail mix, granola, cheese and crackers, or  hummus and veggies. You can even take leftovers from last night’s dinner.


Healthy Snacks
Carry A Healthy Mommy Snack Bag


3.  Carry a water bottle around.


Water bottles are like those darn cloth grocery bags. You know, the ones you forget in the car when you go inside the grocery store?  We all have multiple water bottles in the house. But I know, it’s so easy to forget to fill them up and take them with you when you’re on the go. 


Why water?  Well, water perks you up and keeps you hydrated.  You need to keep hydrated because every system in your body relies on it.  And drinking water regularly throughout the day replenishes what you lose.  If you need an incentive to drink more, then add a few lemon or cucumber slices to your water bottle for a tastier sip. 


4.  Take a break and eat lunch with your kids.


Turn off your cell phone, sit down at the table with your kids and enjoy lunchtime together.  It’s tempting to be busy the minute kids are preoccupied with food. But remember, you need a break, and you need to eat as well.  Lunch is a good and easy way to squeeze in both.


5.  Meal plan. 


It’s stressful getting meals together fast with screaming kids at your feet.  As much as you want to create healthy meals, it’s difficult to do on the fly. That’s why having a meal plan is golden. Plus, it’s easy to do.  It will also save you money, add variety to your meals and help to feed your kids great tasting dinners. 


Here’s what you do: when the kids are in bed sleeping or napping, grab your calendar and decide how many nights that week you will cook. Find recipes you will make. Maybe it’s only one or two nights, it doesn’t matter.  Write the recipe name in your calendar and where the recipe is (cookbook, magazine, website). Create a shopping list.  Order your groceries on-line and strike  “What am I going to make for dinner tonight?” off your to-do list.  You’ll be amazed at how stress free daily cooking will be. Really. 


As a mom, remember to put yourself first.  Healthy eating is a doable self-care goal. If you do it, everyone will benefit.


Meal Plan
Meal Plan


Friday, October 6, 2017

Easy Cranberry Sauce

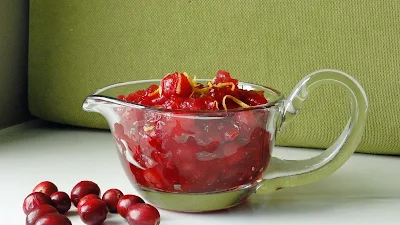
Homemade Cranberry Sauce
Homemade cranberry sauce made in 15 minutes!

Easy Cranberry Sauce


Impress your guests this Thanksgiving by serving freshly made Cranberry Sauce.  It's super easy and can be made 1 week in advance.  

12 ounces fresh cranberries
3/4 cup sugar
1 cup water
1 teaspoon grated lemon peel

Add all ingredients into a sauce pan and heat on a medium high heat.  Bring to a boil, stirring to dissolve the sugar.

Lower temperature and simmer for 10 minutes stirring until soft.  Cool, then refrigerate in a air-tight container.

Picture of fresh Cranberries
Fresh Cranberries


Take the stress out of preparing dinner every night for you family and learn how to meal plan.  Sign up for our FREE course, "How To Meal Plan For The Everyday Home Cook."  It's Free!


Tuesday, September 12, 2017

Homemade Yummy Vanilla Pudding Recipe With Berry Topping

Homemade Vanilla Pudding Recipe With Berry Topping
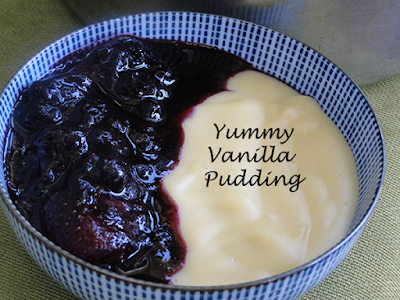
Homemade vanilla pudding is easy to make

Have you ever made pudding from scratch?  It’s super easy and rather tasty.  Here is a kid-friendly recipe worth trying.  The berry topping is optional depending on how much time you have.  


Yummy Vanilla Pudding With Berry Topping


Makes 4 small servings

2 1/4 cups 2% milk
3 tablespoons cornstarch
1/2 cup sugar
2 large eggs
1 tablespoon butter
2 teaspoons vanilla extract
Pinch of salt

In a medium size sauce pan whisk sugar with cornstarch and milk.  Turn up heat to medium high and stir until just about boiling, about 5 minutes.  In a separate bowl whisk 2 eggs and 1/4 cup milk.  Slowly whisk in the hot milk and cornstarch in a slow and steady stream, whisking constantly so you don’t get scrambled eggs.

Add mixture back to the pot and cook on medium heat, whisking until thick, about 5 minutes or so.  Add butter, vanilla and salt.  Stir, then transfer to a bowl.  Place parchment paper on top the surface of the pudding. Chill until ready to serve.  


Berry topping

3 cups fresh or frozen mixed berries
1 tablespoon sugar
1 tablespoon fresh lemon juice

Place fruit, sugar and lemon juice in a medium sized pan and cook over medium high heat for 5 minutes until fruit is warm and has a sauce-like consistency.  Server over yummy vanilla pudding. 


Friday, September 8, 2017

What Are Modified Milk Ingredients?

“And, it’s made with real liquid milk,” said the elderly woman in a chef’s hat and apron at the grocery store.  

She handed me a small, free sample of Monterey Jack cheese produced by a Canadian cheese company. 

 “And, it has no modified milk ingredients in it.” She added.

“Oh really?” I said. “And what exactly are modified milk ingredients?”  

“Oh, it’s kinda like a paste or a powder, but not liquid milk.” 

Hmmm….not exactly a scientific answer, but my curiosity was piqued so I headed out to discover exactly what modified milk ingredients were and if I should be eating them.


What are modified milk ingredients?
This package of cheese has "no modified milk ingredients"


What Are Modified Milk Ingredients?


Liquid milk can be separated into different components such as casein, castanets, whey, powdered milk, butter oil, milk protein isolates and milk protein concentrate.

 “Rather than list the ingredients separately, the manufacturer is able to use this generic description which also allows for changes to be made to the dairy formulation at a later date without having to re-do the label information on the packaging material. In this scenario the product has been "modified" by mechanical means.” - Canadian Dairy Commission

These components are then added back into products such as cheese, yogurt and ice cream as modified milk ingredients.  This way the product can be made cheaper with a longer shelf life and, I suspect, a compromised taste.  

What’s in Cheese?


If I were to make cheese at home I would use milk, a bacteria culture and rennet (a milk clotting enzyme).  I would not use modified milk ingredients. 

The cheese that I ended up buying from the lady at the grocery store did contain liquid milk and the ingredients was as follows:  fresh, pasteurized milk, bacterial culture, salt and microbial enzyme.

When I scoured the cheese aisle at the grocery store I noticed many products contained modified milk ingredients.  A fact I’d never realized until now. 

For instance, here are the ingredients listed on a block of light mozzarella cheese: pasteurized partly skimmed milk, modified milk ingredients, bacterial culture, salt, calcium chloride, microbial enzyme. Who knew? Did you?


What’s in Ice Cream?


 Again, if I were to make ice cream at home, I’d use cream, milk, egg yolk and sugar…and again, no modified milk ingredients.  However, when I pulled a carton of ice cream out of my freezer there was ‘modified milk ingredients’ and no mention of cream listed in the ingredients as follows:  fresh milk, sugar, milk ingredients, glucose solids, modified milk ingredients, water, honey, modified corn starch, guar gum, mono and diglycerides (soy), xanthan gum, polysorbate 80, carrageenan, natural & artificial flavours, lemon juice concentrate, natural colour, potassium sorbet. Whew!
  
So, I phoned up the company who makes the product, and I was told that milk ingredients is a broad term for any unaltered milk product that’s an ingredient in the ice cream which could include milk, cream or butter.  It’s all lumped together so you really don’t know how much cream is actually in ice CREAM.  They also told me the modified milk ingredients were chemically altered milk products produced in their factory which again, could comprise a range of components.

The Taste


I now had the answer to what’s in modified milk ingredients.  It also explained my disappointment with the taste of ice cream.  When I was a kid, I would seek out bowls of ice cream and savour each creamy, cold spoonful of the velvety delight. 
It was so delicious my sneakiness was worth my mother’s wrath. She who was the keeper of all sweets.  Today, when I eat ice cream I still anticipate that same sensation. But I’m always disappointed.  The rich, creamy flavour has been replaced with milk ingredients, and modified milk ingredients and ice cream now tastes like nothing more than sugar and milk with little cream.


Bottom Line


So, knowing this, I’m going to read my food labels on all dairy products from now on and only buy products without modified milk ingredients. I’m also going to try and find the cream in the ice cream.  It may cost more, but it will be worth it. 


Other Articles From The Blog You May Enjoy:


Tuesday, September 5, 2017

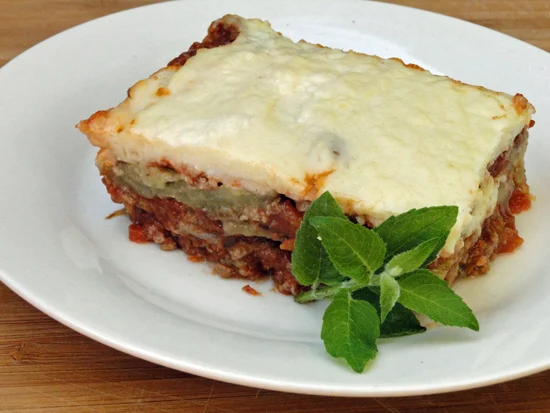
Easy Moussaka Recipe


Moussaka
Moussaka with eggplant

An easy dish to make that will freeze well. Grill extra eggplant and add to your sandwich for lunch the next day. Serve with a big green salad.

Wednesday, August 30, 2017

Life Span of Pasta Sauce


“I keep my pasta sauce in the refrigerator until it grows mould on it. Is this okay? How long should I keep pasta sauce?” asks my niece Meryl.


Great question, I’m always surprised when I learn the shelf life of food products. To find the answer go to the manufacturers website and look under their FAQ section. Sometimes they share this information, sometimes they don’t. If the answer is not posted, then I either phone them up on their toll-free number or I email them the question. I always get an answer.

I checked out three different pasta sauces and got three different answers:

1. Prego Pasta Sauce (a division of Campbell’s) – I phoned and was told that once opened, the sauce should not be kept for more than 14 days (2 weeks) in the refrigerator. If you purchase more than you need, they suggest you freeze the extra in plastic freezer bags. It will keep frozen for up to 6 months. 

2. Ragu – on their website it says their rich and meaty sauce will last for up to 7 days in the refrigerator and 3 months in plastic bags in the freezer. However, if it’s a cheese creation sauce, than only a few days in the refrigerator and do not freeze.

3. Classico – Maximum 3 – 5 days in the refrigerator and 2-3 months in plastic storage bags in the freezer.

Remember, once you open a jar of pasta sauce, write the date somewhere on the outside of the jar. This way, you don’t have to wait until the mould grows!


Tuesday, August 8, 2017

Roasted Beet Salad With Feta Cheese

Roasted Beet Salad With Feta Cheese
Fresh beets from the farmers market

Here is a beet recipe that's easy to try. Plan ahead and roast the beets then toss everything together with feta cheese and you have a delicious roasted beat salad
 

Roasted Beet Salad With Feta Cheese Recipe

Serves 4

4 medium sliced beets
2 tablespoons red wine vinegar
1 tablespoon honey
¼ cup olive oil
1 small head of red leaf lettuce, washed and torn into bite-sized pieces
2 handful of beet leaves, washed and torn into bite-sized pieces
½ small red onion, thinly sliced
½ cup feta cheese, crumbled
salt and pepper to taste

To roast beets, cut off stems to 1 inch from root and cut off the end pieces. Wash. Wrap individually in foil. Place on a cookie sheet and cook at 400 degrees F. until soft, about 45 minutes to 1 hour. When slightly cooled, remove from foil, peel and slice.

In a small bowl, whisk together vinegar, honey and oil oil. In a salad bowl combine lettuce, beet leaves and onion slices. Pour dressing over salad and toss. Season with salt and pepper. Place beet slices on top and sprinkle feta cheese all over.


Roasted beet salad with feta cheese
Pizza and roasted beet salad with feta cheese


Other Salads To Try:


Spinach salad with strawberries, Pine Nuts, Mushrooms and Sweet Balsamic Vinaigrette


Sunday, July 16, 2017

Pesto Sauce

Ingredients To Make Pesto
Pesto Ingredients

Here is a family favourite recipe. We often make lots and freeze the extra.


Pesto Sauce Recipe

 
2 cups fresh basil, washed and dried
2 cloves garlic, peeled
1/4 cup pine nuts
1/2 teaspoon salt
1/4 cup grated fresh Parmesan cheese
1/3 cup olive oil

Place all ingredients in a blender. Puree until desired consistency. Serve on pasta, pizza or in a tomato sandwich.

Other Pesto Recipes


Thursday, June 22, 2017

Kale Salad with Dried Cranberries, Feta and Green Grapes


Fresh Kale
kale


Kale Salad with Dried Cranberries, Feta and Green Grapes Recipe


An easy salad to make that has lots of different textures and super tasty!

Serves 4

2 tablespoons fresh lemon juice
1 tablespoon apple cider vinegar
1/3 cup olive oil
1 teaspoon honey
1/3 cup dried cranberries
1/3 cup slivered almonds, toasted
½ cup green grapes, sliced in half
8 cups red leaf lettuce, torn into bite size pieces
4 cups Russian Kale, stemmed and torn into bite-size pieces
1/3 cup feta cheese, crumbled
Salt and pepper, to taste

Combine lemon juice, apple cider vinegar, olive oil, honey into a small bowl and whisk to combine. Add all other ingredients into a salad bowl and toss with dressing. Season with salt and pepper to taste.

Sunday, June 11, 2017

Risotto with Veggies

Risotto in a bowl surrounded with fresh cut vegetables.
Easy risotto with veggies


This risotto with veggies recipe is great because you can add any vegetable you like. Check your crisper and throw in whatever looks good. This is an easy, tasty meal to make for friends on the weekend.  

Serves 4

2 tablespoons butter
2 tablespoons oil
1 leek, tops removed, chopped
1 clove garlic
1 zucchini diced
12 asparagus stalks, ends removed and cut into 2“ pieces
1 red bell pepper, seeded and diced
1 carrot, peeled and diced
1 jalapeno pepper, seeded and diced (optional)
1 ½ cups Arborio rice
1 larger or two smaller tomatoes, diced
Pinch red pepper flakes
1/3 cup fresh basil leaves, chopped
½ cup white wine
4 cups chicken stock, or vegetable broth heated thoroughly
1 ½ cup fresh Parmesan cheese, grated
salt and pepper to taste

Heat butter and oil in a medium-sized sauce pan. 

 Add leeks and garlic and sauté two minutes. 

Add zucchini, asparagus, red bell pepper, carrot, jalapeno pepper and sauté until soft, about five more minutes. 

Add rice and coat well. Add tomatoes, red pepper flakes, basil leaves and wine. Stir until the liquid has been completely absorbed. 

 Add one ladle of hot stock and simmer, stirring until it has been absorbed. Continue to add hot stock one ladle at a time, stirring after each spoonful and adding more once it’s been absorbed. 

 Cook until all the liquid has been absorbed and the rice is tender but still firm (al dente) about 18-20 minutes. 

 Add Parmesan cheese and season with salt and pepper.

Risotto with fresh veggies in a bowl.


Tuesday, May 9, 2017

Rhubarb Sugar Cake

rhubarb sugar cake
Rhubarb Sugar Cake


Rhubarb is plentiful these days, so time to gobble it up.  But don't eat their leaves or roots because they are poisoned with oxalix acid which can lead to death if consumed.  Ouch!

Monday, April 3, 2017

Pasta With Garlic, Tuna And Capers

Easy tuna, capers garlic pasta


This meal is super fast and creates little mess! It's sure to impress your partner.  It uses mostly pantry items which is helpful for last minute meals.  

Monday, March 27, 2017

Homemade Tomato Soup

Tomato soup an easy weekday meal for the family
Easy homemade tomato soup


I grew up on canned tomato soup, and never was a big fan, so I didn’t have any interest in making my own. That was a mistake. I’ve discovered it’s simple to make and tastes way better then what I had as a kid. Here is a recipe to try.

Homemade Tomato Soup

Serves 4

2 tablespoons olive oil
2 tablespoons butter
1 small onion, chopped
1 celery stick, diced small
1 carrot, diced small
2 cloves garlic, minced
1 28 ounce can diced tomatoes
1/4 cup tomato paste
2 cups chicken stock
1 teaspoon sugar
1 bay leaf
Salt and pepper
Grated Parmesan cheese (optional)

Heat oil and butter in a medium-sized pot over medium-high heat. 
Add onion and sauté until soft, about 4 minutes. Add celery, and carrot and garlic. Continue to sauté another 3-4 minutes until veggies start to soften. 
Add tomatoes, tomato paste, chicken stock, sugar and bay leaf. Bring to a boil. Lower heat and simmer for 20 minutes. Discard bay leaf. 
Keep in saucepan and puree using an immersion blender or let cool briefly then puree in 2 or 3 batches in a blender. Return soup to pot, season to taste with salt and pepper. Reheat if necessary.

Homemade tomato soup


Homemade Tomato Soup


Looking for another soup recipe? 


Salmon Corn Chowder

Carrot Soup

Lentil Soup


Monday, March 13, 2017

Chocolate Sugar Cookies

chocolate sugar cookies

These luscious delicious chocolate cookies make the perfect treat for you and your friends any time of the day.

Monday, March 6, 2017

How To Avoid Dishpan Hands

How to avoid dishpan hands.
Use oven mitts!

I was born with dishpan hands. It’s embarrassing, especially when I shake hands with other people. I’m sure it feels like rubbing against coarse sandpaper. 

I cook a lot, which obviously doesn’t help.

I’ve tried to improve this uncomfortable situation using various therapies through the years. This includes slathering on expensive ‘rejuvenating’ ointment at night and wearing white cotton gloves to bed. Not only did I feel foolish sleeping with white gloves but my rough hands never did rejuvenate.   

I’ve tried using Vaseline, olive oil and various hand-crafted creams, all with no positive results. When I was told by a dermatologist to apply hand cream 6x’s a day, I started keeping little tubes in my car.  I diligently applied it when I waited at stop lights. I thought this was a brilliant tactic, but it only left me driving with a greasy steering wheel. 

To be honest, I continually give up on all treatments after a few weeks because, well, if my rough hands didn’t transform and become velvety and baby-bum soft in that time then, in my mind, it doesn’t work on my cement-like hands. It is kinda like going on a diet. It gets boring, tedious and bothersome after a few weeks if there aren’t instant amazing results. 

The problem with my dry skin, weathered hands is not only with cooking. It’s in the hot soapy water they are constantly immersed in while washing the dishes. Plus, I also have the knack of constantly burning myself. I’ll pull something out of the oven and, in my excitement and anticipation of looking into the pot, I’ll pick up the lid with my bare hands. Ouch! Of course the lid is hot, it just came out of a 350 degree F oven!  I have many burn scars from my distracted cooking.  

Another peril are the oven racks. I forget (or can’t be bothered) to wear oven mitts with the extra large cuffs when I’m pulling out a sheet of cookies or muffins. Instead, I just grab a flimsy dishtowel and, well, I think you can guess what usually happens.

So, after 30 years of cooking I’m, pretty qualified about what not to do in the kitchen if you’re trying to have queen-like hands.  


How to avoid dishpan hands


1.  Water and hot oil in a pot do not mix. Be Careful.


If you have hot oil in a pot on the stove, and water accidentally drops into it, then the  oil will bounce out of the pot and leave a nice round flesh wound on your hands that will turn into a lifelong tattoo. Given this, remember to dry off any food before you add it to hot oil.   


2.  Buy thick oven mitts and use them.


3.  Buy decent rubber gloves and use them whenever you wash dishes.  


They need to be quite thick. The thin ones don’t protect your hands from the heat and I find they tear after a couple of weeks. The more expensive pairs are worth the money. 


4.  Use vinyl gloves when prepping food.


When you chop, cut, or peel any type of vegetable, I like to use disposal vinyl gloves, kinda like what the dentist uses. I buy a big box and keep them in the kitchen. This protects my hands from drying out (and smelling like garlic and onions), when prepping vegetables.


5.  When you do burn your hands, stop what you are doing and attend to yourself (the food can wait).  


Run cold water over your burn for 10 minutes.  You want to cool off the skin and ease the pain.  If you don’t want to waste water or your hand still hurts after the 10 minutes, then wrap your hand in a clean towel that’s been soaked in cold tap water.  When the burn warms up the towel,  refresh it with cold water.

6.  Use aloe vera cream on burns.

I once ended up in a hospital emergency and was told to use aloe vera cream, which really did help relieve the pain.  They also told me to keep my tetanus shot up-to-date (which is still on my to-do list).  

In summary.


I suggest trading in the white cotton cloves for the vinyl, rubber and oven mitts. Of course you could always try convincing others in the house to do all the vegetable chopping and dishwashing!  

As for me, I’d like to see a robot invented that will wash all my dishes and chop the veggies, and then I won’t have to worry about protecting my rough, dishpan hands.


How To Avoid Dishpan Hands
Wear oven mitts and rubber gloves